Photography Tips for Wildlife and Rainforest Conditions: Gorilla trekking photography ranks among the most genuinely challenging wildlife photography scenarios on earth: you get one hour, in a dark rainforest, under strict rules banning flash and mandating minimum distance, shooting a jet-black subject that moves unpredictably and confuses nearly every camera meter ever built.
This guide covers the specific gear, settings, and techniques that actually work, drawn from what experienced wildlife photographers consistently recommend for both gorilla trekking and the wider East African safari environment.
Most wildlife photography happens in open savanna with abundant light; gorilla trekking throws that entire framework out the window. You’re standing on a steep, muddy hillside beneath a dense forest canopy that swallows light, and understanding that reality before you arrive genuinely shapes how well-prepared you’ll be.
The Right Lens: Why Bigger Isn’t Always Better
Contrary to what many first-time trekkers expect, an ultra-telephoto lens is often genuinely less useful than a mid-range zoom for gorilla photography, since viewing distances are frequently just seven to ten meters, and gorillas sometimes move even closer.
A 70-200mm f/2.8 lens is the consensus favorite among experienced wildlife photographers specifically for gorilla trekking, offering a wide aperture for low light alongside enough reach for tight portraits. For chimpanzee tracking, where subjects are often higher in the canopy and more distant, a 100-400mm lens provides useful additional reach that gorilla trekking generally doesn’t require.
Camera Settings That Actually Work
Shoot in Aperture Priority mode with exposure compensation dialed to -1 or -2, a genuinely essential adjustment given how consistently camera meters overexpose black-furred subjects, reading them as darker than they are and consequently blowing out surrounding highlights. Use a wide aperture, f/2.8 to f/5.6, to let in maximum light beneath the forest canopy, while remaining mindful of the correspondingly shallow depth of field this creates for group shots.
ISO should run higher than most photographers are naturally comfortable with, typically 800 to 1600 as a baseline, and extending to 1600-3200 or even higher when conditions genuinely demand it. A sharp image with moderate noise almost always outperforms a blurred image captured at a lower, more conservative ISO setting. Shutter speed should stay at a minimum of 1/250s to freeze normal movement, increasing to 1/500s or faster for genuinely active gorillas or chimpanzees.
Autofocus and Burst Mode
Set autofocus to continuous tracking mode, allowing your camera to adjust focus dynamically as gorillas move through dense, cluttered vegetation. Enable burst or continuous shooting mode to capture multiple frames of fast-moving subjects, though the best photographers use this selectively rather than simply holding the shutter for the full hour, since the strongest images typically happen when gorillas genuinely ignore the camera entirely, staying calm, shooting deliberately, and waiting specifically for eye-contact moments rather than spraying hundreds of largely similar frames.
Managing the Forest’s Genuine Contrast Problem
Beyond low light itself, the rainforest creates a further genuine challenge: a gorilla may sit in deep shadow while a bright, sunlit opening appears directly behind it, creating exposure difficulties that standard camera metering struggles to resolve automatically.
Shooting in RAW format rather than JPEG preserves considerably more recoverable detail in both shadows and highlights, allowing you genuine flexibility to correct this contrast during post-processing rather than being locked into whatever the camera decided in the moment.
Protecting Your Gear From Rain and Humidity
Sudden rain showers are genuinely common in the rainforest regardless of season, so a proper rain cover or waterproof bag for your camera is essential rather than optional. Even without active rain, humidity runs consistently high, and avoiding lens changes during heavy moisture prevents water droplets and dirt from working their way inside your camera body.
Back at the lodge after each day’s trek, let your gear fully air dry before storing it, and silica gel packs inside your camera bag help absorb residual overnight moisture that could otherwise damage sensitive electronics over a multi-day trip.
Battery and Memory Management
Cold, humid forest conditions genuinely drain batteries faster than expected, so carrying at least one, ideally two, fully charged spare batteries is essential given the extended hours a trek can involve before you even reach the gorillas. Bring more memory card capacity than you think you’ll need, particularly if shooting in burst mode or RAW format, both of which consume storage considerably faster than standard single-shot JPEG photography.
No Flash, No Exceptions
Flash photography is strictly prohibited throughout every gorilla trekking sector in both Uganda and Rwanda, since it can genuinely startle and stress the animals. Confirm your flash is fully disabled before setting out, since an accidental flash firing during your one precious hour with the gorillas isn’t merely a photography mistake; it’s a genuine rule violation that guides and rangers take seriously.
Which Sector Suits Photographers Best
Within Bwindi specifically, different sectors offer genuinely distinct photographic conditions. Buhoma combines accessible trails with mature rainforest, striking a workable balance between manageable trekking and strong photographic opportunity.
Ruhija sits at a higher elevation, where mist frequently enhances rainforest photography, and soft morning light here creates particularly exceptional portrait conditions. Rushaga, hosting the highest number of habituated families and the Gorilla Habituation Experience, remains the preferred sector for photographers specifically seeking the longest possible encounters.
Nkuringo rewards physically prepared visitors with genuinely dramatic scenery, delivering strong environmental, landscape-inclusive photography opportunities beyond the gorillas themselves.
Quick-Reference Settings Guide
| Setting | Recommended Range |
| Lens (gorillas) | 70-200mm f/2.8 |
| Lens (chimpanzees) | 100-400mm |
| Aperture | f/2.8-f/5.6 |
| ISO | 800-3200 (up to 6400 if needed) |
| Shutter speed | 1/250s minimum, 1/500s+ for active subjects |
| Exposure compensation | -1 to -2 stops |
| Autofocus | Continuous tracking mode |
| File format | RAW (preserves shadow/highlight detail) |
Beyond the Gorillas: Rainforest and Wider Safari Photography
The same principles genuinely extend to broader rainforest and forest-edge photography throughout your East Africa trip, where birding, chimpanzee tracking, and forest walks all benefit from the same wide-aperture, higher-ISO approach, given the similarly limited light beneath the dense canopy.
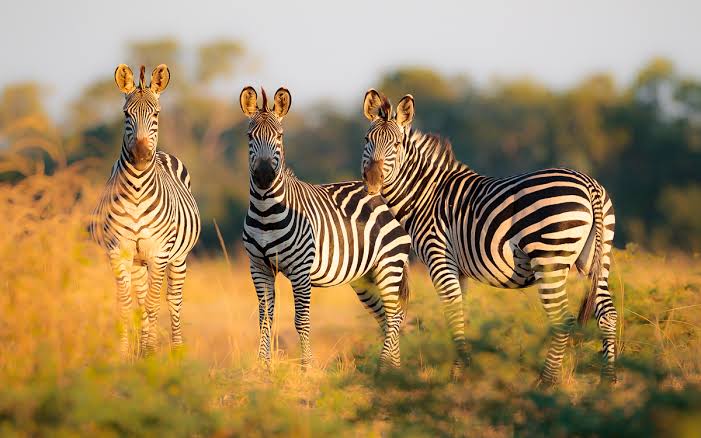
For open savanna game drives elsewhere in your itinerary, by contrast, standard daylight settings and a considerably longer telephoto lens, 300mm or beyond, generally serve you better given the wide-open, brightly lit terrain.
Composition Techniques That Separate Snapshots From Strong Images
Beyond technical settings, composition genuinely matters for elevating gorilla photography from a documentary snapshot to a truly compelling image. Waiting specifically for eye contact, rather than photographing every visible moment indiscriminately, produces considerably more emotionally resonant results.
Including environmental context, such as a hand gripping a branch, dappled forest light, and another family member in the background, tells a richer story than a tightly cropped portrait alone. Shooting at the gorilla’s own eye level, crouching where necessary rather than always shooting downward, creates a genuinely more intimate, respectful perspective.
Post-Processing Considerations
Given the genuine exposure and contrast challenges rainforest shooting presents, expect to spend real time in post-processing recovering shadow and highlight detail from your RAW files. Adjusting white balance is often necessary too; dense canopy frequently casts a green color cast across images that a straightforward white balance correction in post-processing resolves considerably better than attempting to nail perfectly in-camera under such variable, mixed lighting conditions.
Smartphone Photography: A Genuine Alternative for Casual Shooters
Not every trekker needs a dedicated camera setup. Modern smartphones with strong low-light performance can produce genuinely respectable gorilla trekking images, particularly when shot in the phone’s RAW or professional mode if available, and held as steadily as possible given the absence of image stabilization equipment that most dedicated cameras offer.
Travelers who prioritize capturing memories over producing print-quality images will find that a well-used smartphone remains a genuinely valid choice.
Frequently Asked Questions
What lens is best for gorilla trekking photography?
A 70-200 mm f/2.8 zoom is the consensus favorite, offering a wide aperture for low light and enough reach for close portraits, since viewing distances are often just seven to ten metres.
Why does my camera consistently underexpose or overexpose gorilla photos?
Black fur confuses standard camera meters, which read the dark subject and tend to overexpose surrounding highlights. Dialing exposure compensation to -1 or -2 stops in Aperture Priority mode genuinely corrects this issue.
What ISO should I use in the rainforest?
Typically, I use 800-1600 as a baseline, extending to 1600-3200 or higher when light demands it. A sharp image with moderate noise consistently outperforms a blurred image shot at overly conservative ISO.
Is flash photography allowed during gorilla trekking?
No, strictly prohibited throughout every sector in both Uganda and Rwanda, since it can startle and stress the gorillas. Please ensure your flash is disabled before your trek begins.
How do I protect my camera from rain and humidity in the rainforest?
Use a waterproof rain cover or bag, avoid changing lenses during heavy moisture, let gear fully air dry before storing it each evening, and pack silica gel packs in your camera bag to absorb residual humidity overnight.